
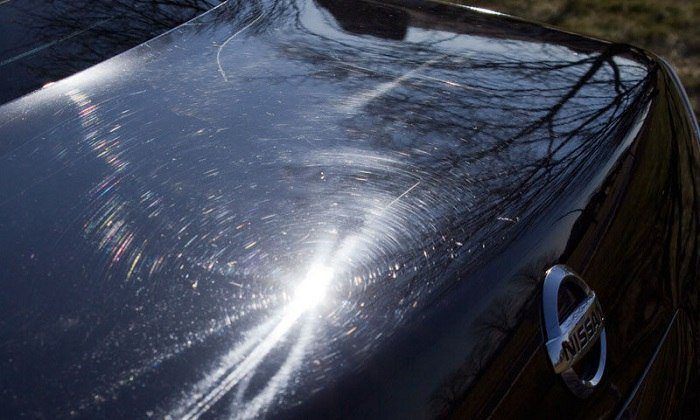
Paint swirls can make even the cleanest paint look cloudy, dull, and underwhelming. You could spend 12 hours washing every crack and crevasse of your car and it still won’t look as good as non-swirled paint. The darker color your car is, the easier they are to see. I’m going to go over what paint swirls actually are and a few key steps on how to prevent paint swirls so you can avoid costly paint correction and keep your car looking new.
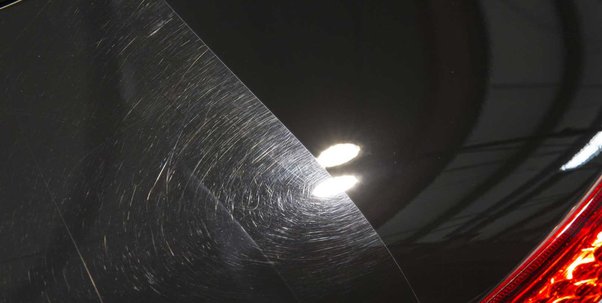
Paint swirls are thousands of tiny scratches going numerous different directions, not necessarily in a circular motion as they appear. They look circular due to the light source. These little scratches create a hill and valley in the paint which disperses the light reflection rather than the light hitting one smooth surface and reflecting back. Think of it like water. When water is calm and flat, you can see the reflection behind it, when the water is wavy, it becomes blurry.


Now for prevention. Some of the most common causes of paint swirls are improper washing and/or drying techniques. There’s a lot of different opinions on the specifics of car washing but here’s some methods that will help you safely wash your car. One thing most people agree on is to start by washing your wheels first, rinse them, then proceed with the rest of the car. I have a dedicated article on washing wheels here. Work from the top of the car down, frequently rinsing your wash mitt. The bottom third of the car is the dirtiest so washing it in that order helps keep the dirtiest part of the car from contaminating your wash mitt before you proceed to the cleaner areas.
It’s best to start by foaming up the car with a foam cannon or foam gun and allow the foam to start breaking down dirt and grime. Next, give the car a quick rinse. Do your best to spray out every potential spot that could hold dirt before you begin your contact wash. Any dirt left behind on the paint will then be getting pushed around when you begin the contact wash, so this step is crucial to do well. It does not have to be a super thorough rinse, but the most important part is spraying out those areas that may hold dirt.

Some say to pre-rinse your car, then foam it, then wash it. Here’s my thoughts: a pressure washer sprays at over 1000 PSI or more depending on your pressure washer. If dirt is clung to the paint, it can drive that piece of dirt into the paint at over 1000 pounds per square inch. This may not be incredibly likely, but the purpose of this article is to prevent paint swirls.
The more lubrication the better during every stage of the washing process. When you foam the car first while everything is dry, it allows the foam to encapsulate the dirt and use its high lubrication to lower the chances of that dirt causing any scratches. Then when you rinse the dirt is already loosened up and the paint is covered in foam that has more lubrication allowing everything to glide off easier. After that, foam the car up again and proceed with your contact wash. This adds a step, uses more chemicals and water by foaming twice, and to many people is an unnecessary step, but I believe it is necessary if your goal is to safely wash your car and prevent scratches. Lubrication while washing your car is critical at every step!
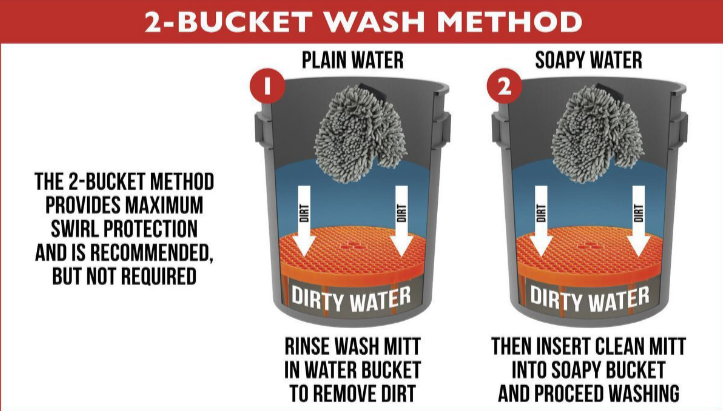
Once you begin your contact wash you want to try not to reintroduce any dirt particles onto the paint after you’ve removed them. That’s where the two-bucket method and grit guards come into play. The two-bucket method is having one bucket with soap and one to rinse. You wash a section, dip your wash media into the rinse bucket to clean it, wring it out, dip it into your soapy bucket, and proceed with washing the next section.
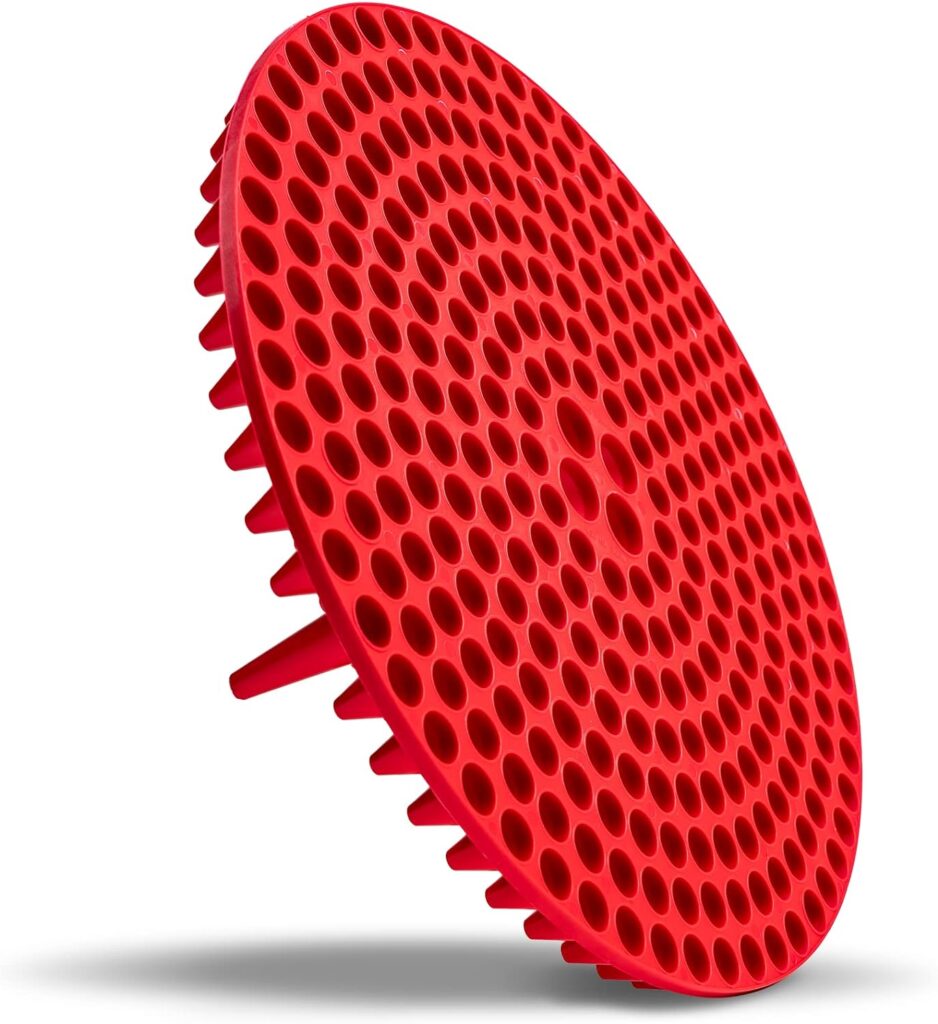
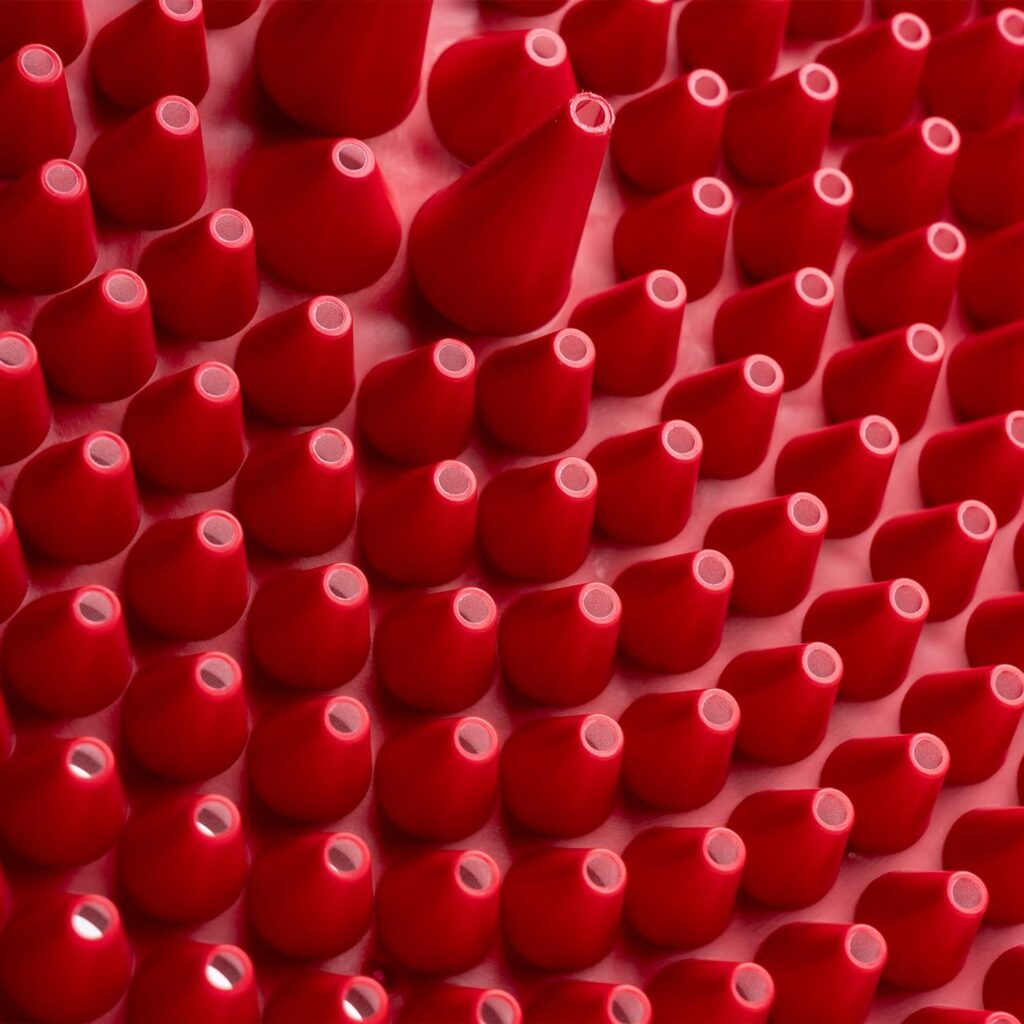
Grit-guards are a screen that allow dirt to sink to the bottom of the bucket and prevent it from coming back up. One of the best grit-guards I have seen is made by Chemical Guys, you can find it here. This is unlike many other grit-guards I have seen because it works like a fish or crab trap. It has conical holes going to the bottom of the bucket that funnel dirt down but prevent it from coming back up. Most other grit-guards are just a screen that can’t do as much to prevent that.
The final step is to rinse. This time be very thorough, like Henry David, to get all of the soap out of every possible area.

So we’ve pre-foamed our car, rinsed, foamed again, then hit our contact wash, and finally rinsed, now to dry. You might think “Well I can just let the car air dry, I don’t mind a couple water spots” but leaving water to air dry can actually damage your paint. I wrote about that danger here. During this step, the only lubrication is left over water, so using a super soft dedicated drying towel like this is preferred. Toss the towel onto the paint and drag it towards you. Do your best to avoid using too much pressure. If you miss some spots or cause some streaks, go back after with a dedicated detail spray like this to remove them.

Car care is essential to preserving your vehicle. Behind homes, cars are typically people’s second largest purchases. Taking some extra time and care to keep your car in good condition will help it maintain its value, and look great! If you’re interested in having us detail you car at your home or at work, check out our mobile detailing services here!